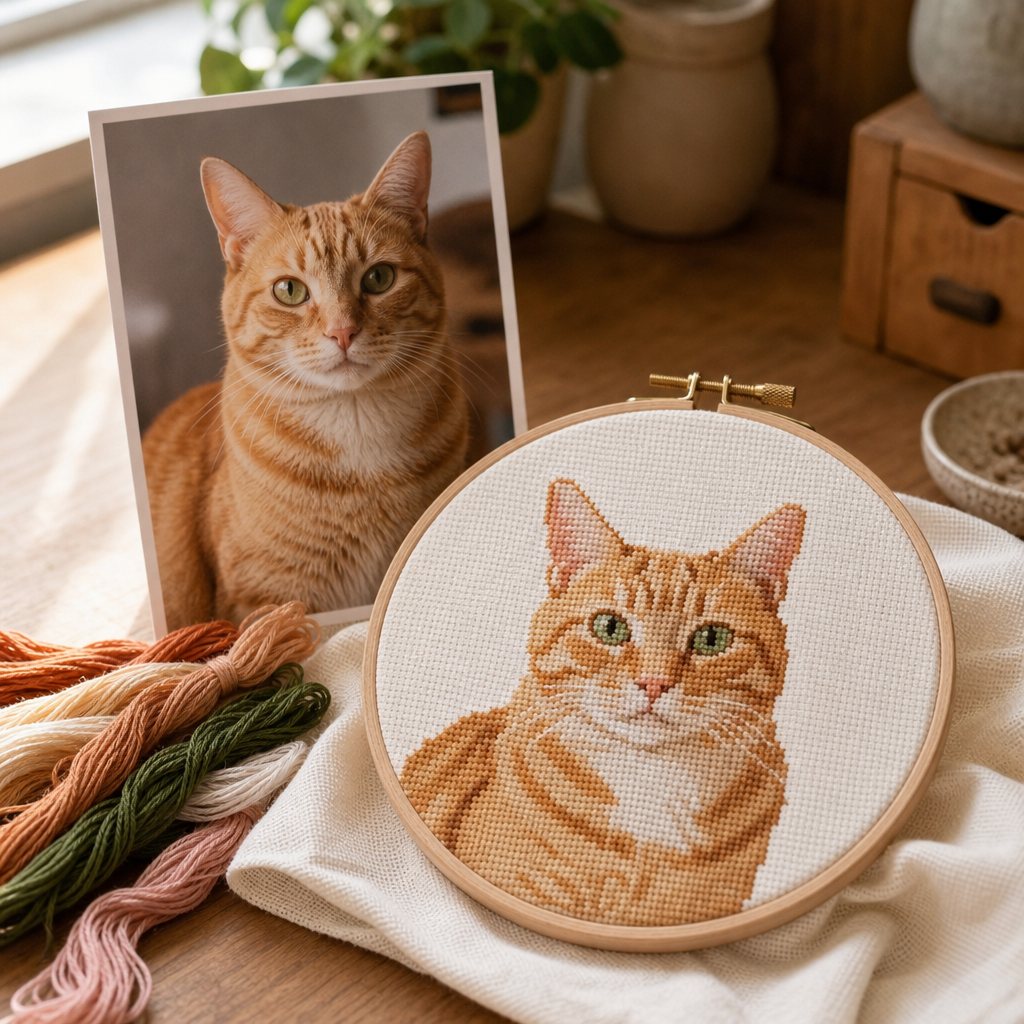
Turning a photograph into a cross stitch pattern is fundamentally an art of reduction. A camera captures millions of subtle shades and continuous gradients; a finished piece of Aida fabric is a discrete grid of a few thousand squares stitched with maybe thirty colors of DMC floss. The real craft lies in deciding what survives that reduction—and making those decisions before you cut your fabric, not forty hours into stitching.
This guide walks through the entire process using the StitchCraft Pattern Maker, which runs free in your browser with no sign-up required. The principles apply regardless of the software you use.
1. Start with a photo built for the grid
Most frustrating patterns are doomed at the photography stage, long before any software touches them. A picture converts beautifully when it features:
- A clear subject that fills the frame. Think pet portraits from head to chest, a single blossom, or a close-up face. A wide landscape with a tiny distant cottage will simply become an unrecognizable brown smudge on Aida.
- Strong contrast against the background. If a dark-furred pet sits on a dark sofa, the grid cannot separate them, and your needle won't be able to either.
- Soft, balanced lighting. Harsh direct flash washes out highlights into stark white; heavy shadows collapse subtle contours into solid black blocks.
- Uncluttered backgrounds. Busy wallpaper or dense foliage turns into "confetti"—dozens of isolated, single stitches across slightly different shades.
If you have several photos to choose from, use the squint test: squint at the image from across the room. If the subject is still immediately recognizable, it has the contrast needed to survive a low stitch count.
2. Pick stitch count before anything else
Stitch count—the pattern's total width and height in stitches—is your master dial. It determines both the level of detail you can capture and the dozens of hours you will spend stitching.
Practical benchmarks for photographic projects:
- 80–120 stitches wide — Great for small gifts, ornaments, and cards. Best for bold graphic silhouettes rather than nuanced faces.
- 150–200 stitches wide — The sweet spot for most pet portraits and florals. Captures recognizable features, eye catchlights, and gentle fur texture.
- 250–300 stitches wide — Ideal for human portraits and detailed architectural scenes. Delivers crisp eyes, subtle skin tones, and sharp edges.
- 350+ stitches wide — Large heirloom projects. Near-photographic fidelity, but represents a serious multi-month commitment.
Remember that doubling the width quadruples the total stitch count: a 300-stitch wide piece is four times the work of a 150-stitch piece, not twice. Start conservatively, and only increase dimensions if the preview genuinely loses crucial features.
3. Match fabric count to your target frame size
Stitch count determines pattern detail; fabric count (Aida count) determines physical finished dimensions. The formula is simple:
Finished Size (inches) = Total Stitches ÷ Fabric Count
For instance, a 200-stitch pattern on 14-count Aida measures 200 ÷ 14 ≈ 14.3 inches wide. The exact same 200-stitch pattern on 18-count Aida measures 200 ÷ 18 ≈ 11.1 inches. Same chart, same colors, same number of stitches—over three inches smaller simply by changing the fabric.
- 14-count Aida is the comfortable standard for most crafters.
- 16 or 18-count Aida is perfect when you need a detailed portrait to fit into a standard ready-made picture frame.
- 11-count Aida is ideal for beginners, younger crafters, or anyone who prefers not to strain their eyes.
Always add at least 3 inches of blank fabric on all four sides (6 inches total to both width and height) for hoop tensioning, framing, and finishing.
4. Set a disciplined DMC color budget
A raw digital photo contains hundreds of thousands of individual colors. A clean, enjoyable cross stitch chart uses between 15 and 40 DMC shades. A restrained palette means fewer thread changes, lower floss costs, and cleaner color blocking on the fabric.
Sensible starting ranges:
- 12–20 colors — Bold, graphic, poster-style designs and folk art.
- 25–35 colors — The optimal sweet spot for realistic pet and human portraits.
- 45+ colors — Reserved for expansive heirloom landscapes with complex lighting.
The golden rule: Adding colors cannot compensate for a stitch count that is too low. At 120 stitches wide, forty colors will only scatter near-identical tones across random squares. If you need more sharpness, raise the stitch count before expanding the palette.
StitchCraft matches every tone to official DMC stranded cotton codes in perceptual CIELAB color space and automatically calculates skein estimates for your shopping list.
5. Eliminate confetti stitches
"Confetti" refers to isolated, solitary stitches scattered across a chart. A design full of confetti is exhausting to sew: every single stitch requires securing, stitching, and finishing off a thread end for just one X.
To tame confetti:
- Lower your color count. Confetti is frequently caused by too many near-identical thread colors competing for the same gradient.
- Increase the smoothing slider. The built-in smoothing filter merges stray single pixels into neighboring color clusters without blurring focal outlines.
- Simplify the background. Blur or remove background clutter before charting, or use AI pre-processing to flatten complex backdrops into solid, calming tones.
The Studio provides a live stitchability score that tracks confetti reduction in real time as you adjust your settings.
6. Review the preview from a stitcher's perspective
Always inspect your pattern across two distinct modes:
- The Stitched Preview: Renders the chart as realistic thread crosses on textured Aida. View it at actual physical size or step back slightly—this is how the finished piece will look on your wall.
- The Symbol Chart: Inspect the symbol legibility. Ensure adjacent shades have high-contrast, visually distinct symbols and that 10×10 gridlines align comfortably.
7. Optional: AI pre-processing for difficult photos
When working with challenging photos—such as complex backgrounds, low lighting, or noisy phone snapshots—an optional AI pre-processing pass can redraw the image into clean, flat illustration planes before sending it to the chart generator. This gives you crisp contours and manageable thread counts while preserving the core likeness.
8. Export print-ready PDF charts
Once satisfied, export your complete pattern package:
- Cover sheet displaying the stitched mockup, finished dimensions across fabric counts, and total stitch count.
- DMC floss key listing color codes, symbols, color names, and estimated skein quantities.
- Multi-page symbol chart formatted with standard 10×10 grid lines and clean page overlap markers.
Summary Checklist
- Crop tight to your main subject.
- Choose a manageable stitch count (e.g., 160–200 for portraits).
- Select your Aida fabric count and calculate cut dimensions.
- Cap DMC colors to 25–35 shades.
- Use smoothing to eliminate stray confetti.
- Export your PDF chart, grab your hoop, and enjoy the stitching process!