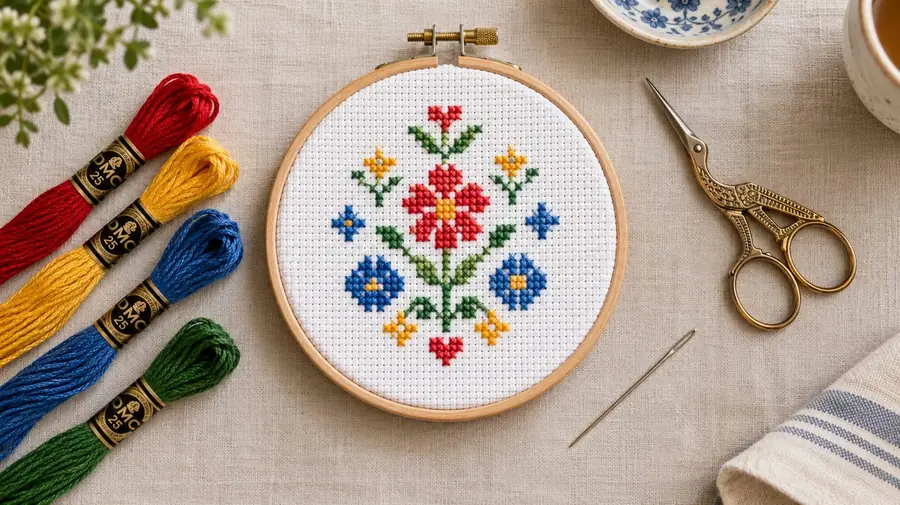
If you have ever stared at a 50-page cross stitch chart with eighty shades of thread and felt completely overwhelmed, take a breath. At its core, cross stitch is the simplest needlecraft ever invented. You are not mastering twelve types of embroidery knots or judging delicate contour curves; you are simply making tiny 'X's on a gridded fabric.
Learning how to cross stitch simple projects comes down to stripping away unnecessary complications: using a minimal tool set, mastering one clean starting technique, and choosing patterns designed for quick success. Here is everything you need to know to complete your first piece this weekend.
1. The Minimal Starter Kit (What You Truly Need)
You do not need a three-tier craft cart to start stitching. You need four basic items:
- 14-count Aida cloth: Aida is a woven cotton fabric with clear, open holes forming a square grid. "14-count" means there are 14 stitches per inch. It is the sweet spot for beginners—easy to see without straining your eyes, yet compact enough to look neat and polished.
- Size 24 tapestry needle: Unlike sewing needles, tapestry needles have a blunt tip and a long eye. The blunt tip glides smoothly through Aida holes without piercing or splitting the fabric threads.
- Six-strand embroidery floss: Stranded cotton (such as DMC) comes in 8-meter skeins of six loosely twisted threads. Crucial rule: You almost never stitch with all six strands. For 14-count Aida, you will separate and use just 2 strands.
- A 5 or 6-inch embroidery hoop: A small wooden or plastic hoop keeps your fabric taut like a drumhead, which helps you maintain even stitch tension.
- Small sharp scissors: Any small pair of scissors will do for snipping thread cleanly.
2. Preparing Your Thread: The "Two-Strand" Rule
The most common mistake new stitchers make is threading the entire six-strand skein through the needle. That produces bulky, jagged stitches that jam the fabric holes.
To prepare your thread:
- Cut a length of floss about 18 inches long (roughly the distance from your fingertips to your elbow). Anything longer will twist, knot, and wear thin from repeated friction against the fabric.
- Hold the cut length near the top with one hand.
- Gently isolate a single strand with your other fingers and pull it straight up and out. The remaining strands will bunch up slightly, then smooth right back down. Repeat to pull a second strand, then smooth the two strands together.
3. The Cleanest Way to Start: The Loop Method
Forget tying bulky knots on the back of your fabric. Knots create bumps that show through when framed, and they easily pull through Aida holes. The simplest and cleanest starting technique is the Loop Start:
- Instead of cutting two strands, cut one strand twice as long (about 36 inches).
- Fold that single strand exactly in half and align the two cut ends.
- Thread the two cut ends through the eye of your needle. You now have a loop at the long tail end of your thread.
- Push your needle up from the back of the Aida to the front, leaving an inch of the loop on the backside.
- Make your first diagonal half-stitch (
/). - Turn the fabric over, pass your needle through the loop on the back, and gently pull snug.
Your thread is now anchored securely with zero bulk and zero knots.
4. How to Stitch: Step-by-Step
Cross stitch consists of two diagonal stitches that cross over each other: / and \.
Step 1 (Half Stitch):        Step 2 (Cross Completed):
Bottom-Left to Top-Right     Bottom-Right to Top-Left
      ( / )                        ( X )
The Golden Rule of Cross Stitch
Always cross your stitches in the same direction throughout the entire project.
If your bottom half-stitch goes from bottom-left to top-right (/), make sure every single stitch has / on the bottom and \ on top. When your top legs all slant the exact same way, the finished surface catches light evenly and looks silky smooth.
The Danish Method (Best for Rows)
When stitching a row of the same color, stitch all the bottom diagonals first from left to right:
/ / / / /
Then return right-to-left, crossing each one:
X X X X X
This uses less thread, keeps the back of your work flat, and is twice as fast as making individual complete crosses.
The English Method (Best for Isolated Stitches)
If you have just one or two standalone stitches, complete each X fully before moving to the next square.
Ending a Thread
When you have about 3 inches of thread left, push the needle to the back of the work. Slide the needle under 3 to 4 existing stitches on the backside, pull through, and snip the excess close to the fabric. Friction holds it permanently in place.
5. What Makes a Pattern "Simple"?
Not all beginner patterns are created equal. When searching for an easy starter project, use this 4-point checklist:
- Grid size under 50×50 stitches: A 40×40 motif on 14-count Aida takes around 3 to 6 hours of relaxed stitching—fast enough to finish in a weekend.
- Limited color palette: Stick to 3 to 8 colors. Every new color requires re-threading your needle and starting a new strand.
- Solid color blocking: Look for shapes filled with continuous blocks of color (like a tulip petal, a geometric icon, or a cartoon silhouette).
- Zero "confetti": In cross stitch terminology, "confetti" refers to solitary, random stitches of one color isolated in a sea of another color. Confetti turns relaxing stitching into an exhausting maze of thread stops and starts.
6. The Modern Shortcut: Generate Simple Patterns with StitchCraft AI
Finding a ready-made pattern that is genuinely simple, high-contrast, and tailored to what you actually love can take hours of searching through cluttered craft blogs.
This is where StitchCraft Studio makes a massive difference:
- Turn Any Simple Idea or Image into a Chart: Upload a pet snapshot, a favorite pixel art icon, or a simple line drawing.
- Automatic Confetti Elimination: StitchCraft's built-in smoothing and AI pre-processing pass collapses noisy gradients into clean, solid color zones designed specifically for beginners.
- Strict Color Caps: Set your DMC floss budget to 4, 6, or 8 colors with a single slider. StitchCraft recalculates the palette in perceptual CIELAB color space, matching each shade to real DMC stranded cotton numbers.
- Instant Printable PDF: Export a clear, large-symbol chart with an exact shopping list of DMC floss numbers and skein counts so you know exactly what to buy at the craft store.
You do not have to settle for generic starter kits. If you want to stitch a tiny coffee cup, your dog's silhouette, or a minimalist botanical leaf, you can generate a custom, beginner-friendly chart in under a minute.
7. Your Simple Project Checklist
Before you make your first stitch, run through these quick steps:
- Find the center: Fold your Aida cloth in half horizontally and vertically. The intersection is the exact center. Mark it with a pin or pencil dot.
- Start from the center: Match the center point of your fabric to the center arrows on your chart. Starting in the center guarantees your design will not run off the edge of the fabric.
- Keep your hands clean: Natural skin oils transfer to cotton thread; wash your hands before each stitching session.
- Do not pull too tight: Let the thread rest flush against the cloth. If the Aida squares are puckering or warping, you are pulling with too much tension.
Cross stitch is one of the few crafts where you can achieve professional, heirloom-quality results on your very first project. Grab an 18-inch piece of thread, hoop your fabric, and enjoy the rhythm of the stitch.
Ready to create your first simple project? Visit StitchCraft to turn any photo, sketch, or idea into a beginner-friendly cross stitch pattern with instant DMC color matching and free PDF exports.