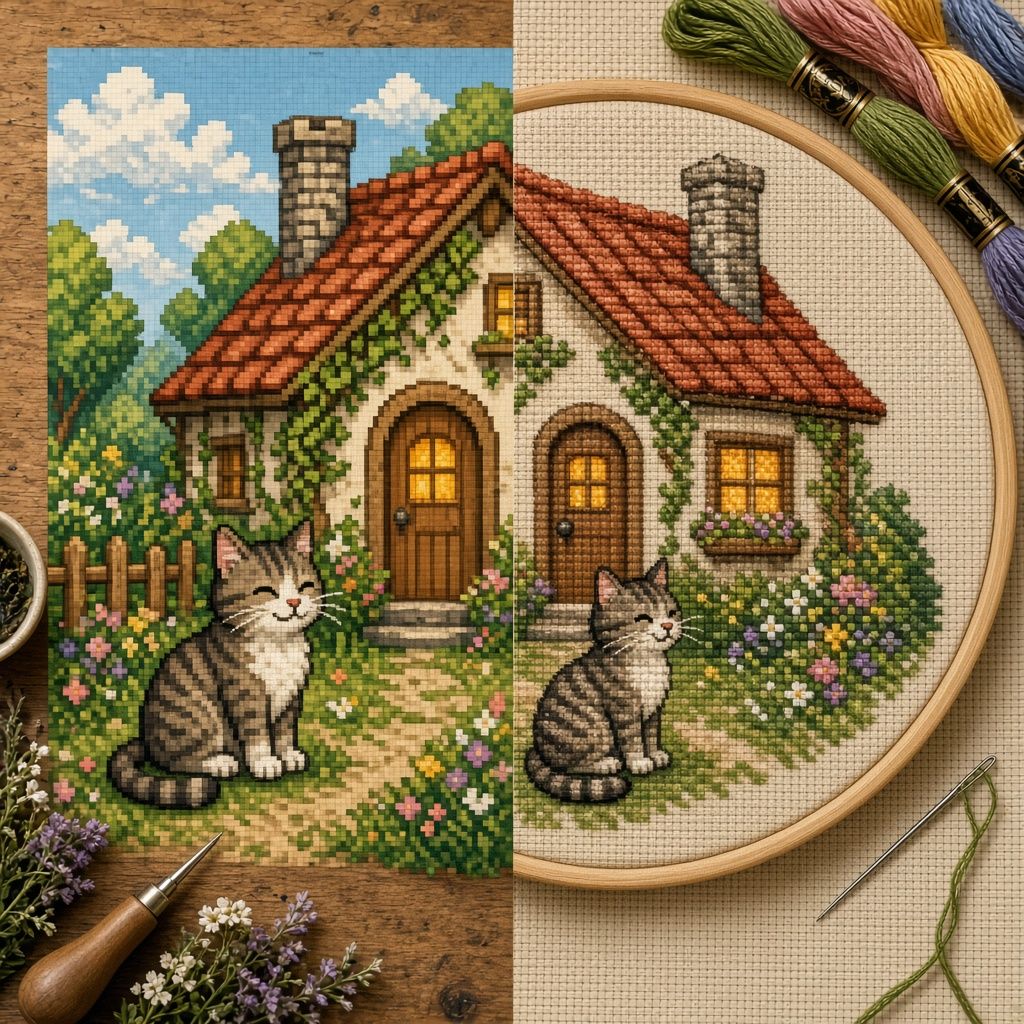
If you have ever tried converting a standard photograph into a cross stitch chart, you know the heartbreak: blurry edges, muddy skin tones, and hundreds of solitary "confetti" stitches that force you to re-thread your needle every two minutes.
That is why converting a pixel art to cross stitch pattern has become the needlework community's best-kept secret.
Pixel art and counted cross stitch share the exact same mathematical foundation: a discrete, two-dimensional grid where every single square represents an uncompromising block of color. When you pair retro pixel aesthetics with modern generative AI, you unlock the ability to design completely custom, charming, and hyper-stitchable artwork in seconds—without ever touching a complicated pixel editor by hand.
In this guide, we will walk through the entire pipeline: how to prompt generative AI for clean pixel graphics, how to turn your pixel art to cross stitch pattern using the StitchCraft AI Cross Stitch Generator on our homepage, and how to prep your DMC floss for a stress-free project.
Why Pixel Art Makes the Cleanest Cross Stitch Patterns
Cross stitch is, quite literally, analog pixel art. An 8-bit video game sprite rendered on a CRT monitor and a sampler stitched on 14-count Aida cloth work on the identical visual principle:
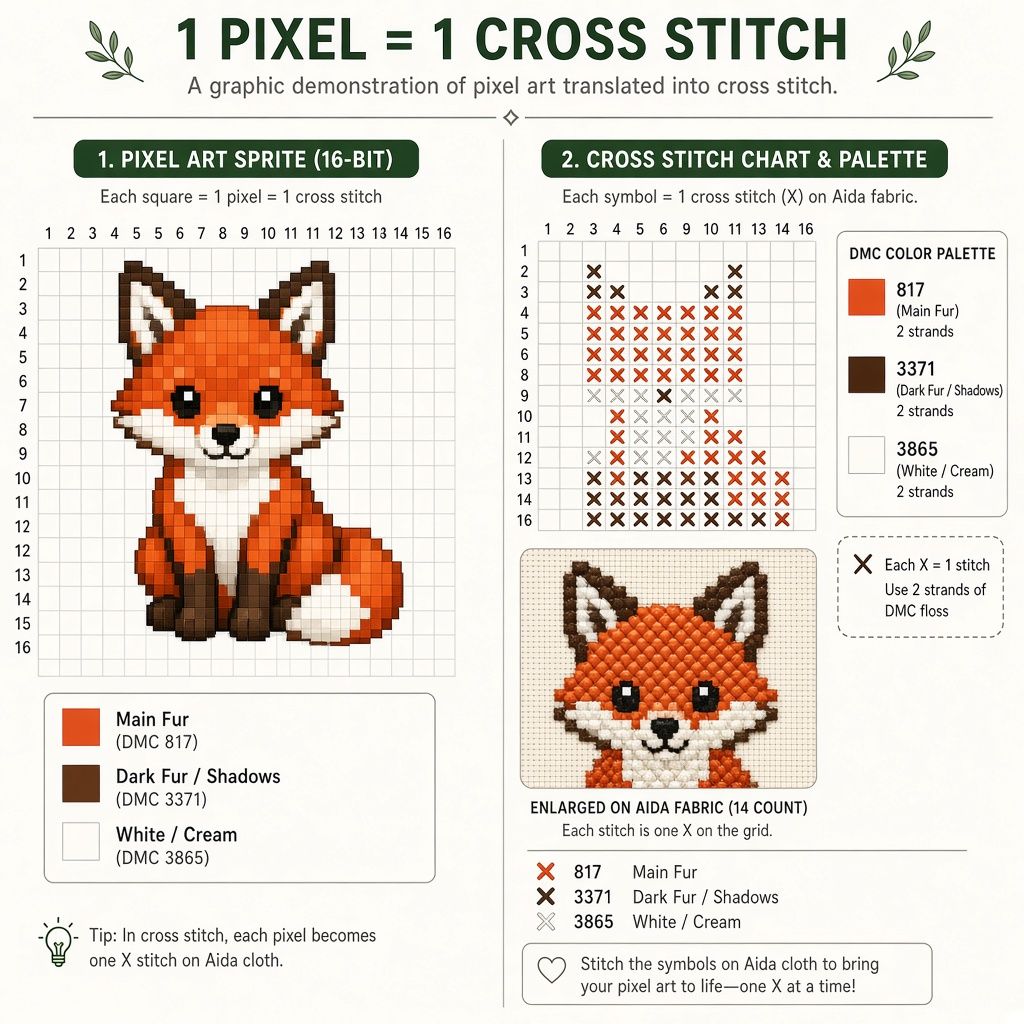
- One Pixel = One Cross Stitch (
1px = 1 stitch): You never have to wonder whether a transition belongs to this square or the next. Each pixel maps 1:1 to a single hole-to-hole cross on your fabric. - Naturally Confetti-Free: High-resolution photos contain millions of continuous color variations. Pixel art relies on deliberate, indexed color ramps (usually 8 to 24 colors total). This guarantees large, satisfying color blocks that are relaxing to stitch.
- High Contrast and Legibility: Pixel art is engineered to be read at small sizes. Facial features, silhouettes, and contours remain crisp even when stitched onto a small 5-inch hoop.
- Fast Stitching Speed: Because you aren't constantly switching between four near-identical shades of beige, you can zone out and stitch entire rows without breaking flow.
Step 1: Prompting AI to Generate Stitch-Perfect Pixel Art
To make a brilliant pixel art to cross stitch pattern, you need source artwork designed for grid conversion. Many generic AI prompts produce "pseudo-pixel art"—images that look pixelated from afar but actually contain blurry anti-aliased edges and non-square artifacts.
When prompting AI models (like Midjourney, DALL-E, APIMart, or Stable Diffusion), follow these four golden rules:
- Specify the bit-depth or console era: Use terms like
16-bit pixel art,SNES RPG sprite style, orGame Boy Color palette. - Enforce crisp grid boundaries: Explicitly add
clean pixel grid,no anti-aliasing, andsharp hard edges. - Cap the palette size: Tell the model
limited color palette under 16 colorsorsolid indexed colors. - Demand an isolated, flat background: Always append
solid neutral background, single color backdrop, no gradients, no scenery clutter.
Proven Prompt Templates for Pixel Art
Here are three tested prompt formulas ready to drop into an AI generator:
1. Cozy Cottage & Landscape Scene
"16-bit cozy fairy-tale stone cottage surrounded by colorful wildflower garden, isometric pixel art sprite, vibrant retro color palette under 16 colors, clean crisp pixel grid, no anti-aliasing, solid off-white background."
2. Expressive Pet & Animal Portrait
"Retro 8-bit cute red fox sitting quietly, pixel art game character sprite, bold graphic silhouette, warm orange and creamy white palette, exactly 6 distinct flat colors, no background noise, pure white background."
3. Vintage Botanical or Coffee Motif
"Pixel art potted monstera plant in a terracotta pot, cozy indoor plant aesthetic, 16-bit pixel art illustration, rich forest greens and warm earth tones, flat solid color blocks, isolated on solid pale cream background."
Step 2: Converting Your Pixel Art to Cross Stitch Pattern in the Landing Page Hero
Once you have your pixel art image—or even if you just have a creative idea in your head—you can convert it into an official DMC floss pattern immediately.
You don't need clunky legacy desktop software. Head over to StitchCraft's AI Cross Stitch Generator in the homepage hero.
The hero section features a versatile two-way generator designed specifically for this workflow:
Option A: Use AI Mode Directly from the Hero Composer
If you don't have a pre-generated image, you can create and chart in one step:
- Scroll to the composer in the hero section of the homepage.
- Click the AI Mode tab.
- Enter your prompt (e.g., "Cute pixel art kitten sleeping in a teacup, 16-bit sprite, flat colors, clean grid").
- Select your preferred art style chip and model.
- Hit the Generate button (the arrow icon) to synthesize the pixel art and immediately hand it off to the Studio for charting.
Option B: Upload Your Pixel Art in Direct Mode
If you already generated a favorite sprite using an AI tool or drew one in Aseprite:
- Open the homepage hero and switch to the Direct Mode tab (it's 100% free and requires no sign-up).
- Drag and drop your pixel art file into the upload zone.
- The generator instantly ingests your pixel image and routes you into the interactive Studio workbench.
Step 3: Fine-Tuning Your Chart Settings
Inside the Studio, StitchCraft analyzes your pixel art and prepares the embroidery chart:
1. Accurate DMC Color Matching in CIELAB Space
Digital pixel art uses sRGB color hexes, while physical embroidery uses cotton thread dyed to official standards. StitchCraft converts every pixel value into perceptual CIELAB space (Delta E) to find the closest real-world match among all 454 DMC Six-Strand Floss shades.
Because pixel art already has an economical palette, you will typically see 8 to 20 DMC colors identified, matching your digital art with striking fidelity.
2. Choosing Fabric Count and Dimensions
The number of pixels determines your pattern's stitch dimensions. To calculate the physical size of your finished piece, apply this simple formula:
Finished Size (inches) = Total Stitches ÷ Fabric Count
| Pixel Art Grid | 14-Count Aida | 16-Count Aida | 18-Count Aida | Best Use Case |
|---|---|---|---|---|
| 32 x 32 stitches | 2.3" x 2.3" | 2.0" x 2.0" | 1.8" x 1.8" | Keychain, patch, gift tag |
| 64 x 64 stitches | 4.6" x 4.6" | 4.0" x 4.0" | 3.6" x 3.6" | 5-inch or 6-inch hoop art |
| 96 x 96 stitches | 6.9" x 6.9" | 6.0" x 6.0" | 5.3" x 5.3" | Framed desk display |
| 128 x 128 stitches | 9.1" x 9.1" | 8.0" x 8.0" | 7.1" x 7.1" | Detailed wall hanging |
Pro Tip: For pixel art projects, 14-count Aida or 16-count Aida is recommended. The slightly bolder thread squares accentuate the retro, chunky arcade feel of pixel art.
3. Taming Stray Artifacts with Smart Smoothing
If your AI-generated pixel art had subtle compression noise or slight gradient bleeds around the edges, adjust the Smoothing slider in the Studio. StitchCraft will absorb stray rogue pixels into neighboring color clusters while preserving the sharp, blocky silhouette of your character.
Step 4: Exporting Your Print-Ready Chart Package
When you are satisfied with the preview, click Export PDF. StitchCraft generates a complete, professional pattern package containing:
- Mockup Cover Page: A realistic textured simulation showing exactly how the physical thread crosses will look inside a hoop.
- High-Contrast Symbol Chart: Clear black-and-white or color symbol charts with standard 10x10 grid lines, center point markers, and page overlap indicators.
- DMC Floss Key & Shopping List: A complete breakdown of each color, including the official DMC code number, color name swatch, required stitch count, and estimated skein yardage.
4 Pro Tips for Stitching Pixel Art Patterns
Stitching a pixel art pattern is uniquely satisfying, but a few needlework best practices will make your finished piece look museum-grade:
- Keep Your Stitches Consistent in Direction: Always make your bottom half-stitch go in one direction (for example, bottom-left to top-right) and your top half-stitch go in the other (bottom-right to top-left). Consistent stitch direction reflects light evenly across solid color blocks.
- Use 2 Strands of Floss on 14-Count Fabric: Two strands of DMC floss provide plump, full coverage that hides the white Aida cloth beneath, giving your pixel blocks solid, vivid saturation.
- Cross-Country Stitching Works Wonders Here: Because pixel art has large clusters of the same shade, you can use the "cross-country" method—stitching all squares of one color in a region before moving to the next—without worrying about counting mistakes.
- Leave at Least 3 Inches of Border: When cutting your Aida cloth, always add 3 inches of margin on every side (6 inches total to width and height) so you have plenty of slack to tension the fabric into an embroidery hoop or frame.
Start Your First Pixel Art Cross Stitch Project Today
Converting a digital pixel art to cross stitch pattern bridges the gap between retro gaming culture and mindful handmade crafting. Whether you want to stitch your favorite 16-bit game character, an AI-generated botanical sprite, or a personalized pixel portrait of your pet, the process has never been faster.
Ready to see your pixels come to life in thread? Jump over to the StitchCraft homepage hero generator, type your idea or drop your pixel art, and have a chart in your hands in seconds!