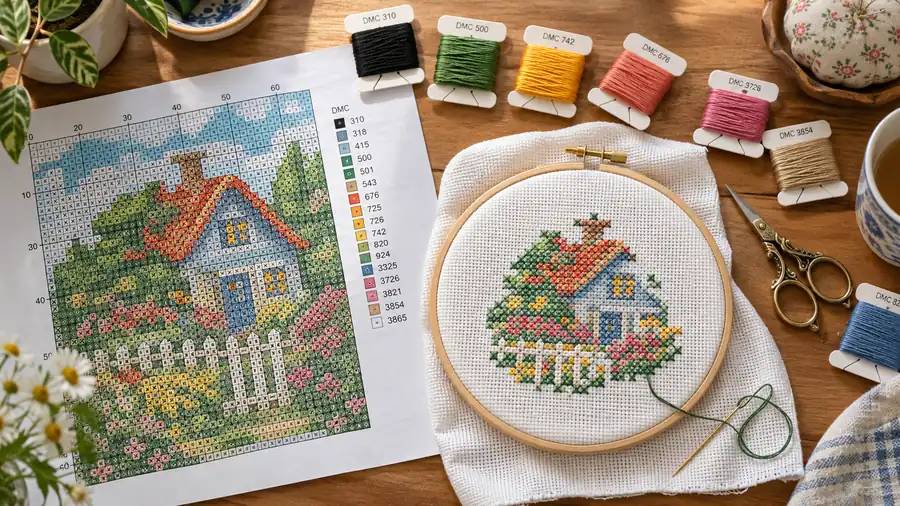
When you open a cross stitch chart for the first time, it can feel like you are trying to decipher a complex electrical schematic or an ancient architectural blueprint. Dozens of cryptic geometric symbols, crisscrossing grid lines, tiny arrows, and dense tables of color codes stare back at you from the page.
Take heart: cross stitch charts are among the most logical and straightforward maps in the crafting world. Unlike knitting patterns written in dense abbreviations (k2tog, sl 1, psso), counted cross stitch charts are strictly visual. Once you understand the basic anatomy of a pattern chart, you can pick up any pattern in the world and stitch with confidence.
Here is your comprehensive, step-by-step masterclass on how to read cross stitch patterns.
1. The Grid System: One Square Equals One Stitch
The foundational rule of counted cross stitch is simple:
One square on the chart grid corresponds exactly to one square on your fabric.
Whether you are stitching on 14-count Aida cloth or 28-count evenweave, each grid cell represents a single intersection where your two diagonal threads will form an 'X'.
+---+---+---+
| ● | ● | ▲ |   --> 2 stitches of Color ● (e.g. DMC 310 Black)
+---+---+---+   --> 1 stitch of Color ▲ (e.g. DMC 666 Bright Red)
| ● | ▲ | ▲ |
+---+---+---+
The 10×10 Grid Lines
Notice that every tenth line on the chart is printed with a bolder or darker line. These 10×10 blocks exist for one reason: to keep you from losing your count.
Instead of counting across 47 individual blank squares, you can quickly scan: "Four 10-stitch blocks plus seven stitches." When working on larger projects, many stitchers use water-soluble fabric markers to draw matching 10×10 grids directly onto their Aida cloth ("gridding").
2. Finding the Center Arrows
Look along the top and left margins of your chart. You will notice small black triangles or arrows pointing inward.
- The arrow along the top edge marks the horizontal center of the pattern.
- The arrow along the side edge marks the vertical center of the pattern.
- Follow those arrows to where their coordinates intersect on the grid: that is the exact center point of your design.
Why You Should Always Start from the Center
If you begin stitching at the top-left corner of an arbitrary piece of fabric, a slight miscalculation in your margins can cause your design to run off the right or bottom edge.
By finding the center of your fabric (fold the cloth in half horizontally, then vertically, and crease the point), you align the chart center with the fabric center. This guarantees your design will be perfectly balanced with equal margins for framing.
3. The Floss Key (Color Legend)
Beside or underneath the chart grid, you will find the Floss Key (also known as the color legend). This table translates the symbols on the chart into physical materials:
| Symbol | DMC Code | Description | Strands | Skein Estimate |
|---|---|---|---|---|
| ● | 310 | Black | 2 | 1 skein |
| ▲ | 666 | Bright Red | 2 | 1 skein |
| ◼ | 820 | Royal Blue | 2 | 1 skein |
| ○ | Blanc | White | 2 | 1 skein |
Key Columns Explained:
- Symbol: The visual icon printed inside the grid cells on the chart.
- DMC Code: The industry-standard floss number used by DMC (the world's most popular embroidery thread manufacturer). This number tells you exactly which skein to buy at the craft store.
- Color Description: The descriptive color name (e.g., "Navy Blue", "Ecru").
- Strands: How many individual threads to pull from the 6-strand skein. For 14-count Aida, this is almost always 2 strands.
- Stitch Type: Most keys specify whether a symbol is for a full cross stitch, half stitch, or backstitch.
4. Decoding Specialty Stitches and Lines
While 95% of most charts are standard full cross stitches, you will occasionally see special markings:
Backstitching Lines
Backstitching is used to outline shapes, define facial features, or write fine text. On your chart, backstitch lines appear as thin, bold lines drawn along the grid edges or cutting diagonally across squares.
The color legend will specify which DMC color and how many strands (usually 1 strand) to use for each line style (solid, dashed, or colored).
French Knots
French knots look like solid black or colored dots placed directly at the intersection of grid lines rather than inside a square cell. They are commonly used for eyes, animal noses, or flower centers.
Fractional Stitches (Quarter & Three-Quarter Stitches)
In highly detailed or organic charts, you might see a single square split diagonally with two different symbols, or a miniature symbol tucked into one corner:
- Quarter stitch (
/half-leg): A stitch that goes from a corner into the center of the square. - Three-quarter stitch: A quarter stitch combined with a full diagonal leg, used to create smooth, curved outlines without jagged pixel steps.
5. Black-and-White vs. Color Symbol Charts
Different designers publish patterns in different formats:
- Color Blocks with Symbols: The easiest format for beginners. Each cell is tinted with the approximate thread color, overlaid with a clear black or white symbol.
- Black-and-White Symbol Charts: Preferred by experienced stitchers for complex, multi-page projects. Because there are no colored backgrounds, it is easy to highlight completed stitches with a yellow highlighter pen or digital PDF markup tool as you stitch.
6. How StitchCraft Studio Creates Crystal-Clear Charts
One of the biggest frustrations stitchers face with vintage or low-quality patterns is symbol confusion: charts that use nearly identical icons (like a tiny square with a dot versus a tiny square with a cross) right next to each other.
StitchCraft Studio was built from the ground up to solve modern chart readability:
- High-Contrast Symbol Separation: Our charting engine automatically selects symbols with distinct visual silhouettes, ensuring neighboring color shades never share visually confusing glyphs.
- True DMC Color Precision: Every chart is indexed against the full DMC stranded cotton library using CIELAB color math, showing you true-to-life previews before you thread a needle.
- Clean Multi-Page PDF Exports: For large designs, StitchCraft automatically divides your pattern into multi-page print-ready PDFs with clear grid page overlaps, page locator maps, and complete shopping lists.
- Interactive Digital Stitching: In addition to printable PDFs, you can track your progress right in StitchCraft Studio on your tablet or smartphone, checking off stitches as you complete each section.
Summary Checklist: Your First 5 Minutes with a Pattern
- Check the fabric count: Note whether the pattern specifies 14, 16, or 18-count Aida.
- Review the thread key: Gather your DMC floss skeins and check that you have 2 strands threaded.
- Find the center arrows: Mark the center intersection on the chart with a pencil.
- Fold your fabric: Mark the center intersection on your Aida cloth.
- Stitch outward: Start with the color at the center of the chart and work outward in comfortable color blocks.
Ready to create your own custom pattern? Head over to StitchCraft to transform your favorite photographs and digital art into clean, beginner-friendly cross stitch charts with instant DMC floss guides.